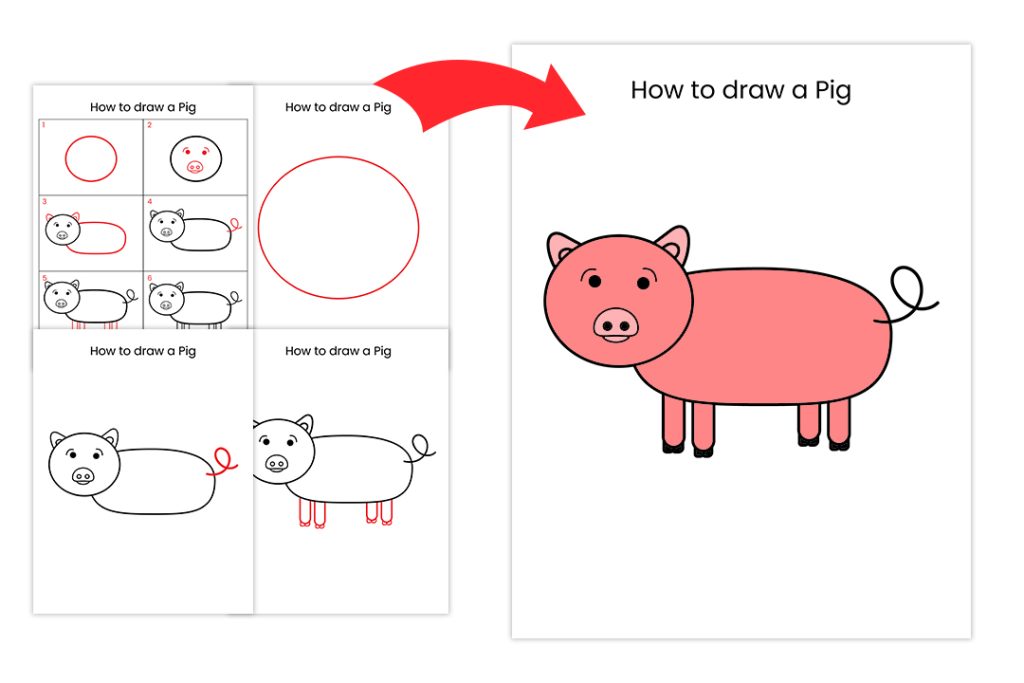
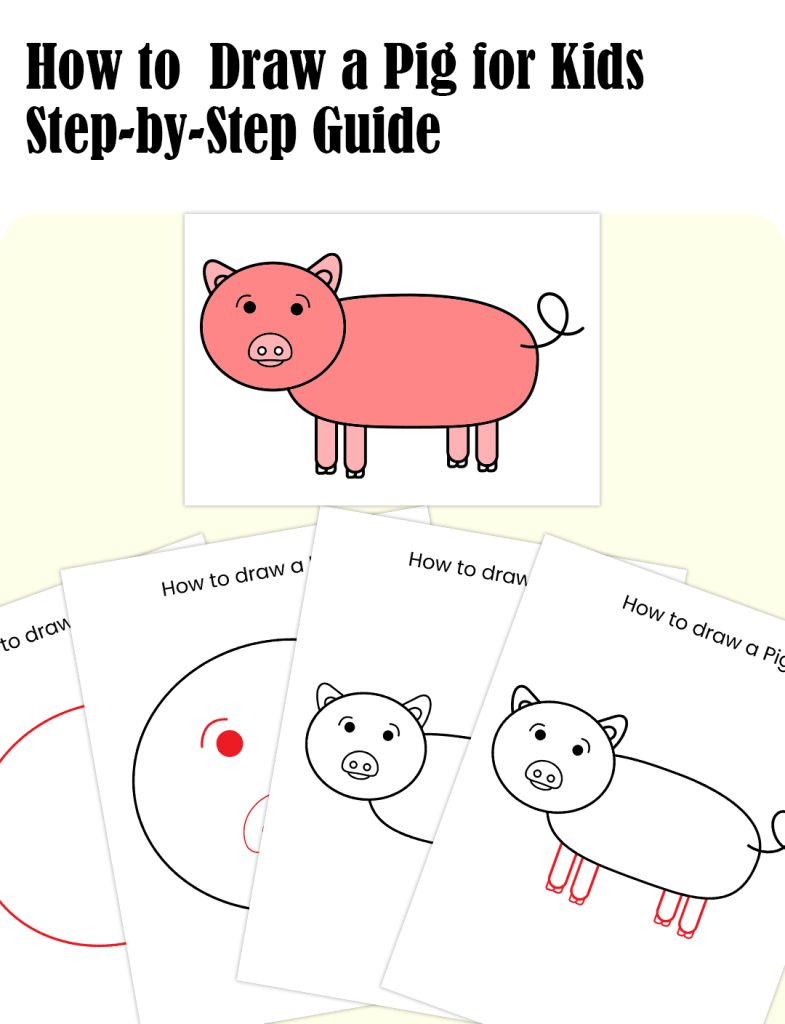
To draw a pig for kids, start with an oval for the body and add a circle for the head. Then, add in the details like ears, snout, and legs, and finally, color it in.
Drawing a pig is a fun and creative activity that can help children develop their artistic skills. With a few simple steps, kids can easily learn to draw a cute and lovable pig. Following a step-by-step guide, kids can create their pig drawing and bring it to life with their imagination and creativity.
This activity encourages kids to explore their artistic abilities and express themselves through drawing. By breaking down the process into simple and easy-to-follow steps, kids can learn to draw a pig with confidence and enjoyment.
Supplies Needed
Before starting to draw a pig, it’s essential to gather the right supplies to ensure the process goes smoothly and the little ones have fun. Here are the basic supplies needed to draw a pig for kids:
Paper
- Blank white paper or a drawing pad
Pencils Or Crayons
- Colored pencils or crayons in different tones, including pink, brown, and black
Eraser
- A soft eraser to easily remove any mistakes while drawing
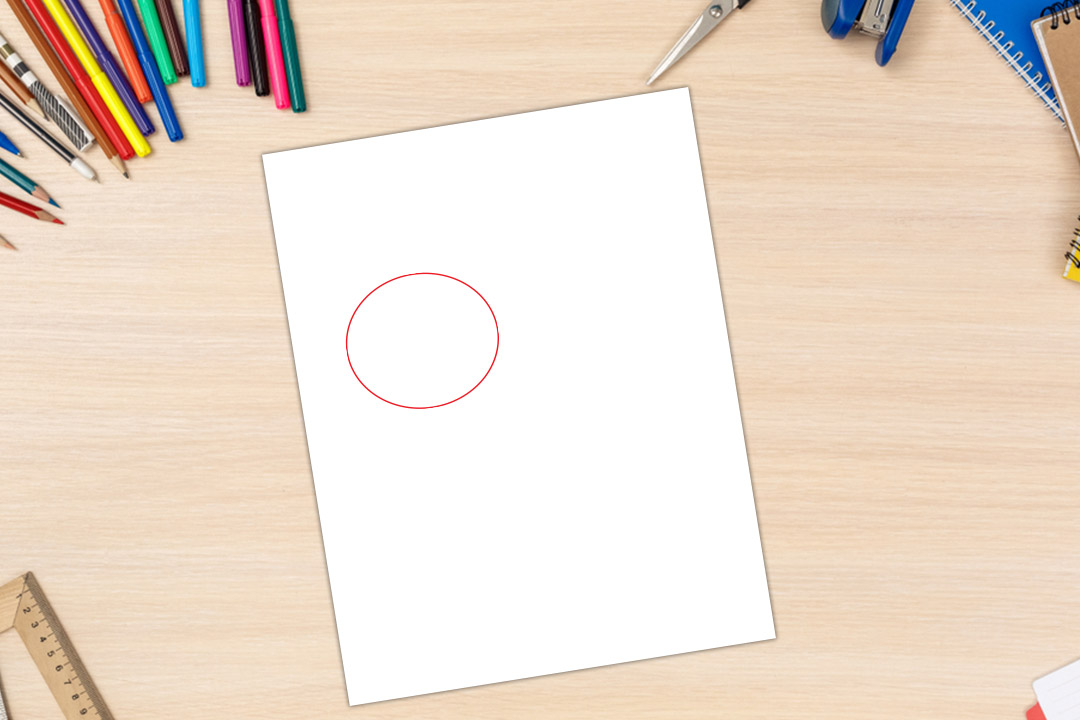
Step 1: Draw The Body
Learn how to draw a pig for kids in just a few simple steps. Start by drawing the body, then add in the details like the face, ears, and tail. This easy tutorial will have your little artist creating adorable pig drawings in no time!
Start With A Large Oval Shape
To begin drawing a pig, start by sketching a large oval shape in the center of your paper or drawing area. This will serve as the basic framework for the pig’s body.
Add Curves For The Body
- After creating the oval shape, add gentle curves to the sides of the oval, creating a more rounded and organic form. This will help establish the overall shape of the pig’s body.
- Ensure the curves flow smoothly from the sides of the oval, maintaining a sense of softness and roundness that is characteristic of a pig’s body.

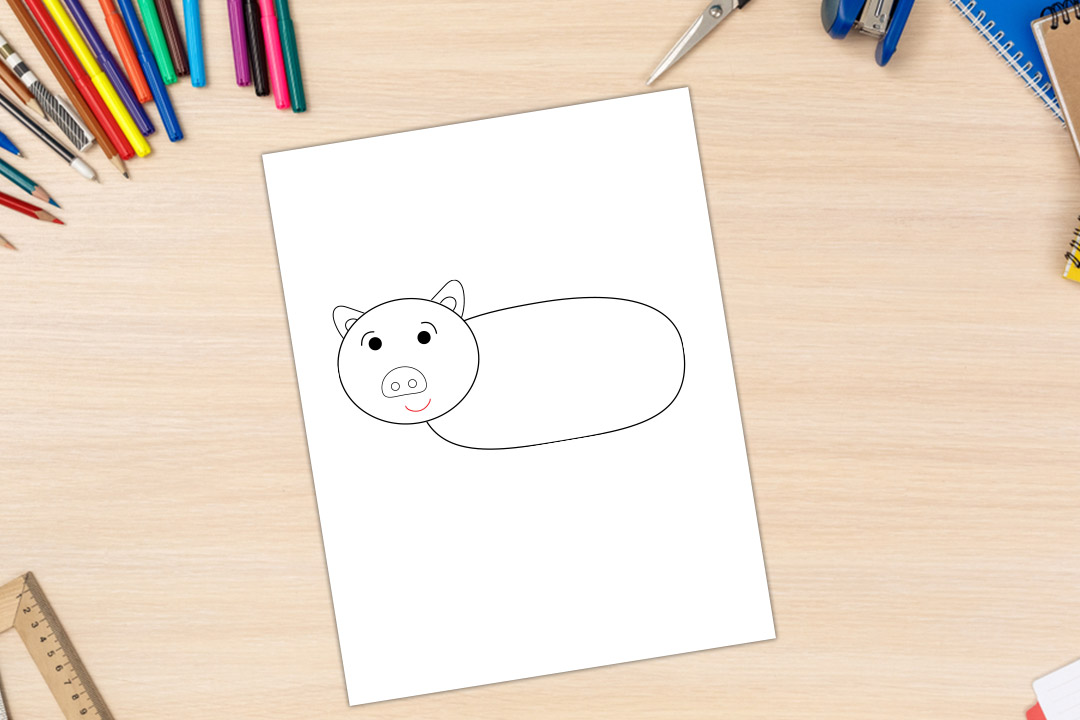
Step 2: Draw The Facial Features
Once you have drawn the basic shape of the pig’s head in step 1, it’s time to add some adorable facial features. This will give your pig more personality and make it come to life! Follow these simple steps to draw the eyes, nose, ears, and mouth.
Add Eyes And A Small Rounded Nose
To start, draw two small circles for the pig’s eyes. Place them above the horizontal line that you drew in step 1, slightly towards the center. Make sure to leave some space between the eyes. These circles will give your pig a cute and friendly expression.
Next, draw a small rounded nose between the eyes, just below the horizontal line. This will complete the pig’s face and make it look even more adorable. Remember to keep all the shapes smooth and rounded to maintain the pig’s cute appearance.

Draw The Ears
Now, it’s time to draw the pig’s ears. Start by drawing two curved lines on either side of the head, extending outwards from the top of the head. The shape of the ears can be a bit like elongated raindrops. Make sure the ears are symmetrical and of equal size.
The pig’s ears should be positioned slightly below the horizontal line and in line with the eyes. They should be pointing outwards, giving the pig a playful and charming look.
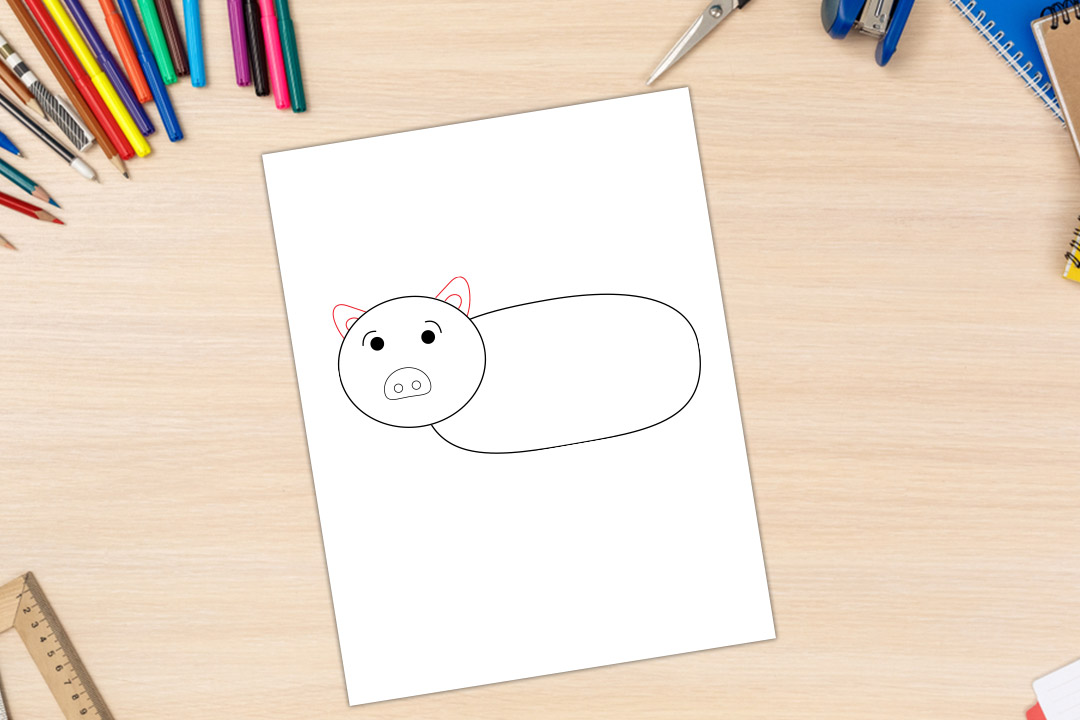
Add A Smiling Mouth
Lastly, draw a smiling mouth just below the nose. The mouth should be a simple curved line that starts from one side of the nose and extends slightly towards the other side. This will give your pig a happy and friendly expression.
Congratulations! You have successfully drawn the facial features of your pig. Now, your pig drawing is starting to take shape and look adorable. In the next step, we will add some final details and complete the drawing. Stay tuned!
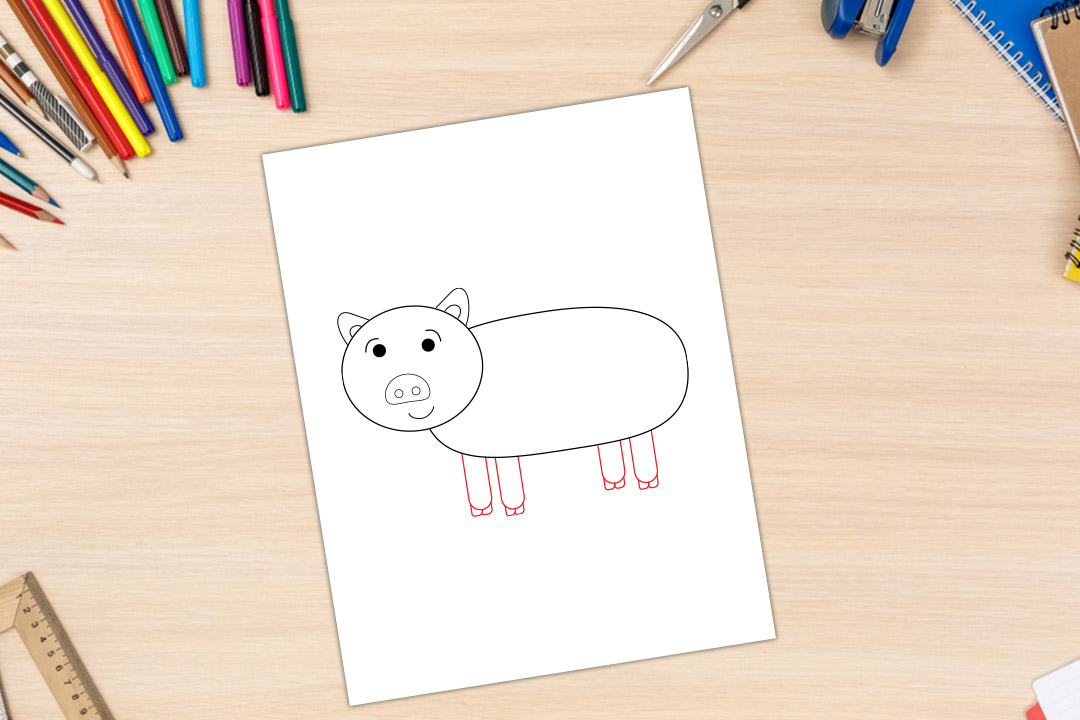
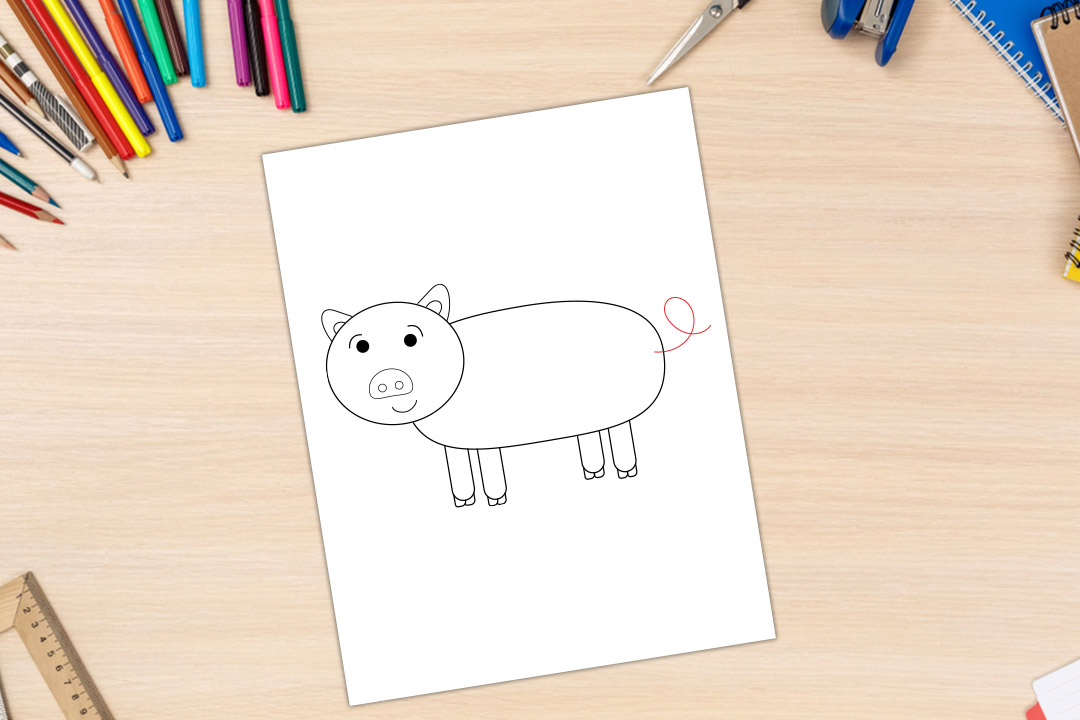
Step 3: Add Details
In step 3 of How to draw a Pig for kids, adding details brings the pig to life. Draw the pig’s snout, ears, and curly tail to make it look adorable and fun. Be creative with the details to give the pig its unique character.
Once you have successfully drawn the basic shape of the pig, it’s time to add some details to make it come to life! In this step, we will focus on adding the legs and feet, adding a curly tail, and creating patterns or textures to enhance your pig drawing.
Draw The Legs And Feet
To draw the legs of your pig, start by adding two short lines extending downward from the body. These lines will serve as the front legs. Next, add two more lines slightly longer than the front legs to represent the back legs. Make sure to include small curves at the bottom of each leg to create the pig’s hooves. Remember, pigs have four legs, so make sure to draw all of them.
Add A Curly Tail
Pigs are known for their curly tails, so it’s important to add this distinctive feature to your drawing. Start by drawing a small curved line that starts from the back of the pig’s body and continues in a spiral shape. Make the coils of the tail gradually decrease in size as you reach the end. Feel free to make the tail as curly or straight as you’d like.
Create Patterns Or Textures
To make your pig drawing more engaging, you can add some patterns or textures to its body. Pigs often have small wrinkles or folds on their skin, so you can incorporate those by drawing small curved lines across the pig’s body. Additionally, you can add spots or stripes if you prefer a patterned pig. These details will give your drawing a more realistic and textured appearance.
Remember, practice makes perfect! Don’t worry if your pig doesn’t turn out exactly as you envisioned. With each attempt, you will improve your drawing skills and be able to create even more detailed and realistic pig illustrations.
Step 4: Color Your Pig
After completing the outline of the pig, it’s time to color it! Use your favorite crayons or markers to fill in the pig with vibrant colors. Have fun experimenting with different shades to bring your pig drawing to life.
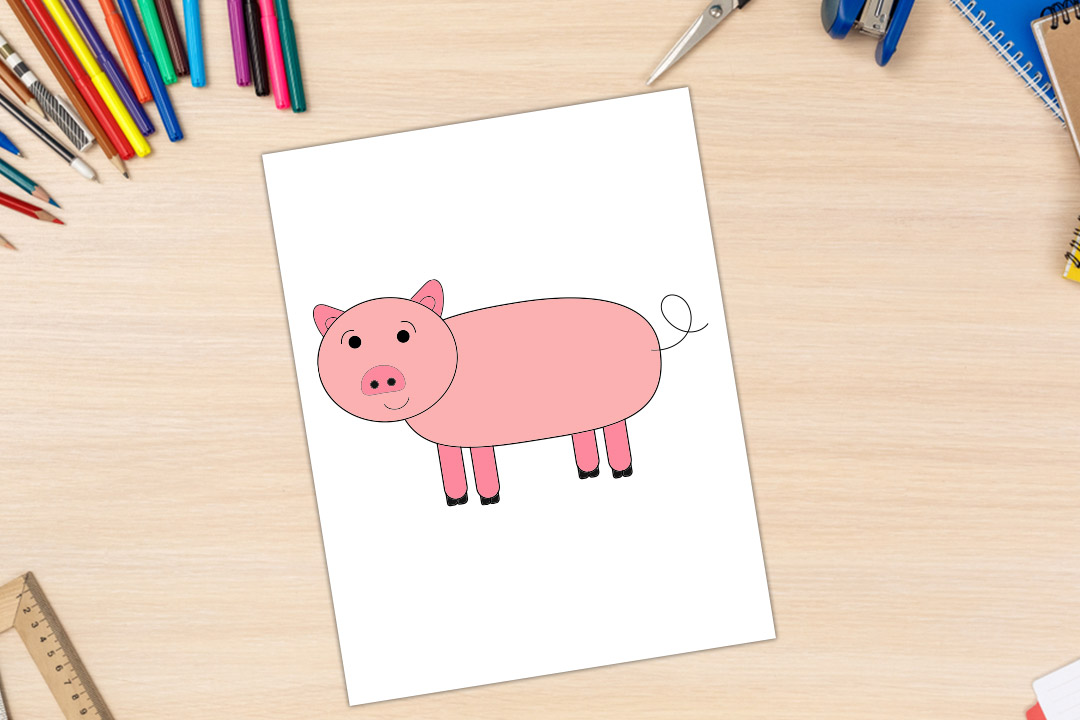
Step 4: Color Your Pig
Now that you’ve completed the initial sketch of your pig, it’s time to bring it to life with colors! This step will add vibrancy and personality to your drawing. Be sure to have your favorite coloring materials ready, whether it’s crayons, colored pencils, or markers.
Choose colors
Before you start coloring, it’s important to think about the colors you want to use for your pig. While pigs are commonly associated with pink, don’t be afraid to get creative and use different shades or even experiment with other colors. It’s your drawing, so feel free to make it unique and fun!
Color in your pig drawing
To begin coloring your pig, take your chosen coloring material and start filling in the outline of your pig. Use light strokes and build up the color gradually. It’s always a good idea to start with lighter shades and then add darker colors for shading and details.
Tips for coloring your pig drawing
- Use a reference image: If you’re unsure about the colors to use, take a quick look at pictures or illustrations of pigs to get an idea of their natural coloring. This will help you create a more realistic representation.
- Blend colors: If you want to make your pig look more vibrant and lively, try blending different shades of the same color or even different colors together. This technique can add depth and dimension to your drawing.
- Add details: Once you have the base color for your pig, you can add details like spots, stripes, or even patterns to make it more interesting. Use a smaller and more precise coloring tool to achieve this.
- Don’t forget about the background: While coloring your pig, don’t neglect the background. You can create a simple background for your pig, like a sunny sky or a grassy field, to make your drawing more visually appealing.
Remember, the most important thing is to have fun while coloring your pig drawing. Let your imagination soar and don’t be afraid to experiment with different colors. Enjoy the process and be proud of your colorful creation!
Frequently Asked Questions On How To Draw A Pig For Kids
How Do You Draw A Simple Pig?
To draw a simple pig:
- Start with an oval shape for the body.
- Add two small circles for the eyes.
- Draw a small triangle for the nose.
- Add two floppy ears on top of the head. 5.
- Complete the pig by drawing four short legs and a curly tail.
Remember to practice and have fun with it!
How Do You Draw A 3 Little Pig Easy?
To draw a simple pig easily, start by drawing an oval for the body. Add legs, ears, and a curly tail. Draw a circle for the head and add eyes, a nose, and a smiling mouth. Finally, add details like hooves and shading.
How Do You Draw A Cute Pig Art Hub?
To draw a cute pig, start by sketching an oval for the body. Add a small circle on the upper right side for the head. Draw two small circular shapes for the ears near the top of the head. Next, add a curved line for the snout and two small dots for the nostrils.
Draw two large oval shapes for the eyes and add a smaller oval inside each one for the pupils. Finally, finish by adding a curly tail and shading to create depth.
How Do You Draw A Christmas Pig?
To draw a Christmas pig:
- Start with a big oval shape for the body.
- Add a smaller oval for the head.
- Draw two small circles for the eyes.
- Add a curved line for the mouth and a triangle for the nose.
- Finish by drawing two small triangles for ears and a curly tail.
Remember to have fun and get creative with colors and decorations!
Conclusion
Drawing a pig can be a fun and creative activity for kids. By following the step-by-step instructions in this blog post, children can learn how to draw a pig easily. Whether it’s for a coloring page or a school project, this guide provides a simple and accessible way for kids to express their artistic skills.
So, grab some paper and pencils, and let your little ones unleash their creativity while drawing adorable pigs! Happy drawing!