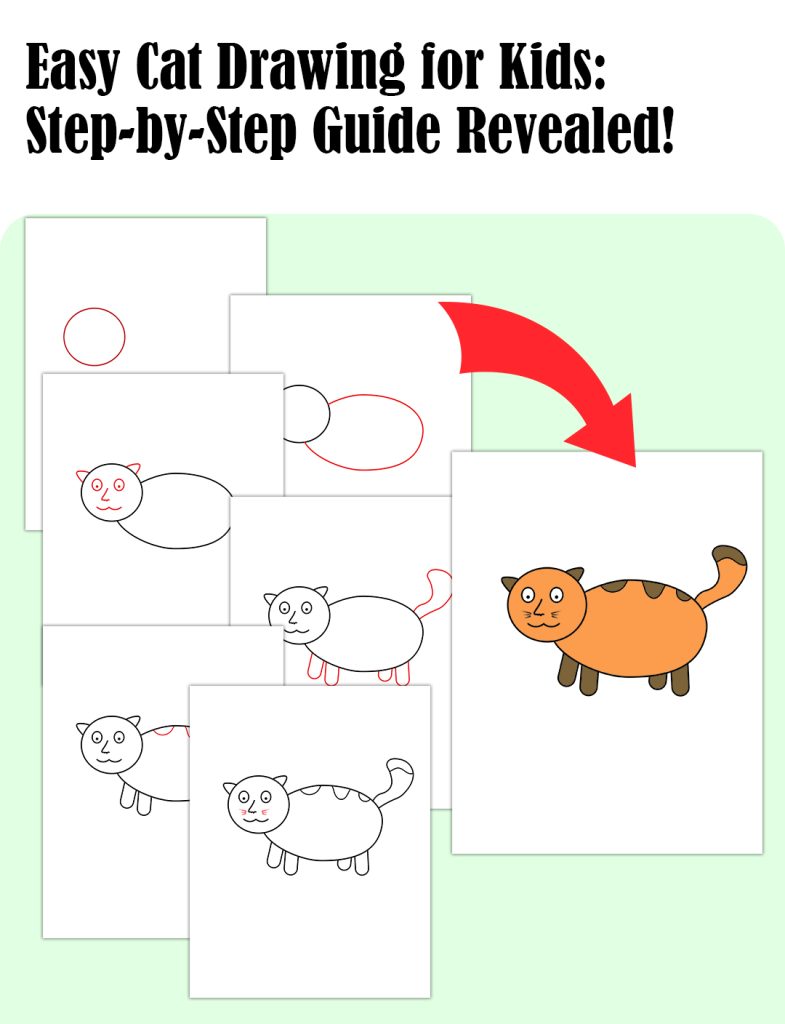
Creating an easy cat drawing for kids can be done with simple shapes and lines. Start by drawing an oval for the body and a circle for the head.
Drawing a cat doesn’t have to be difficult for kids. By breaking down the process into easy steps, children can learn to draw a cat using basic shapes and lines. This fun and simple activity can help enhance their creativity and fine motor skills.
In this guide, we’ll provide step-by-step instructions for kids to create their own cute cat drawings. With these easy techniques, kids will be able to draw a cat with confidence and have fun expressing their creativity through art. Let’s get started!
Choosing The Right Materials
When it comes to creating easy cat drawings for kids, having the right materials is essential to ensure a smooth and enjoyable drawing experience. Here are the key materials to consider:
Pencils
Using a good-quality pencil can make a big difference in the quality of the drawing. A set of pencils with varying lead softness, such as HB, 2B, and 4B, can help kids achieve different line thicknesses and shading effects.
Paper
The type of paper used can affect the way the pencil marks appear. Opt for a smooth, heavyweight paper that can handle erasing and blending without tearing or smudging.
Sketching The Basic Shapes
Sketching the basic shapes is an essential first step in drawing a cat. By breaking down the cat’s body into simple forms, kids can create a foundation for their feline drawing. Encouraging them to start with this basic approach will help build their confidence and improve their overall drawing skills.
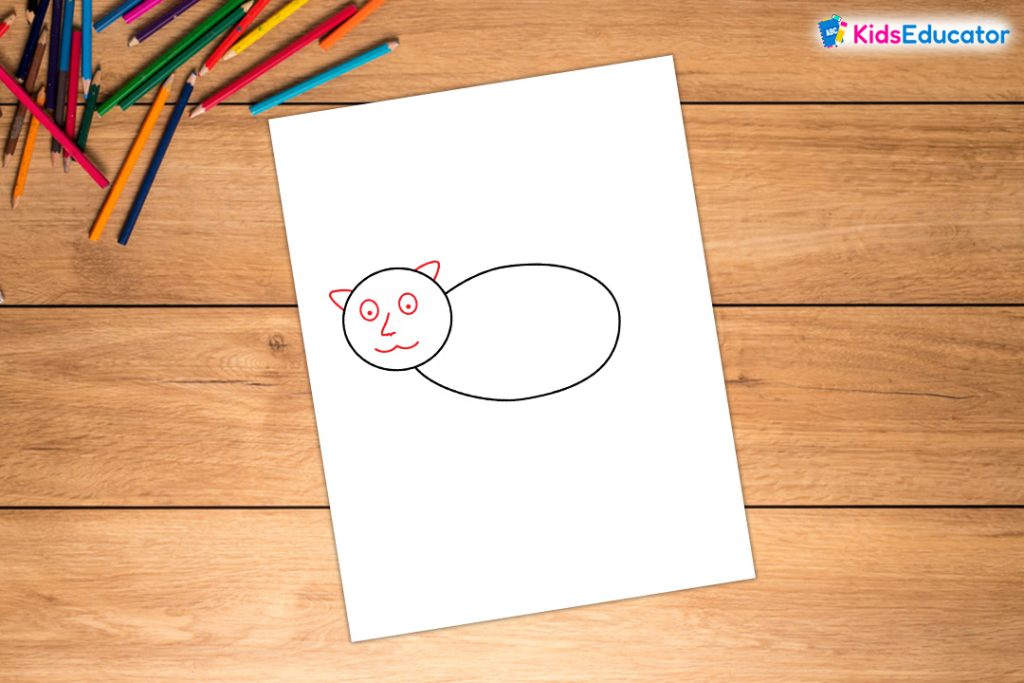
Head Shape
When drawing a cat, begin by sketching the head shape. This can be achieved by creating a rounded triangle, with slightly curved lines to represent the cat’s ears. The rounded triangle forms the forehead and snout area, providing a great starting point for young artists to develop their drawings.

Body Shape
After completing the head, focus on creating the body shape. A simple oval or elongated egg shape can be used to denote the body of the cat. Kids can experiment with adjusting the size and proportions of the oval to make the cat appear slimmer or rounder, encouraging creativity and visual problem-solving.

Adding Facial Details
When it comes to drawing cats, adding facial details is a crucial step that brings your cat drawing to life. Paying attention to the eyes, nose, mouth, and ears will help to create a realistic and cute kitty face. In this section, we will explore how to add these facial details in an easy and fun way.
“eyes”
The eyes are often considered the most expressive feature of a cat’s face. To draw the eyes, start by drawing two oval shapes, slightly slanted and spaced apart. Make sure to leave a small white space inside each oval to create a sense of sparkle and life. Then, add a smaller circle inside each oval for the pupils. You can make them look even more expressive by adding a tiny highlight dot in each pupil.
“nose”
The next facial detail to add is the nose. Begin by drawing a small upside-down triangle between the eyes. Make sure the bottom of the triangle connects to the upper part of the mouth, creating a seamless transition. To give the nose more dimension, add two short lines on each side of the triangle, curving slightly outward. This will create the illusion of a three-dimensional snout.
“mouth”
Now, let’s focus on drawing the mouth. Start by drawing a small, curved line directly beneath the nose. This line will serve as the top lip. Then, draw a slightly larger curved line beneath the top lip to create the bottom lip. Feel free to adjust the size and shape of the lips to give your cat a unique expression. Don’t forget to add a small line at the edge of each lip to indicate the corners of the mouth.
“ears”
The final facial detail to add is the ears. Draw two triangle shapes on the top of the cat’s head, one on each side. The base of each triangle should connect to the head, while the tips of the triangles should point upward. To give the ears a more realistic look, add some small lines inside each triangle to represent fur. This will add texture and depth to your drawing.
Now that we’ve covered how to add facial details to your cat drawing, you can have fun experimenting with different shapes and expressions. Remember that practice makes perfect, so don’t hesitate to try these techniques again and again until you achieve the desired result. With a little bit of patience and creativity, you’ll be able to create adorable cat drawings that come to life.
Drawing The Body
Learn how to draw a cute cat with our easy and kid-friendly body sketching techniques. These step-by-step instructions will help children create their own adorable cat drawings with minimal effort.
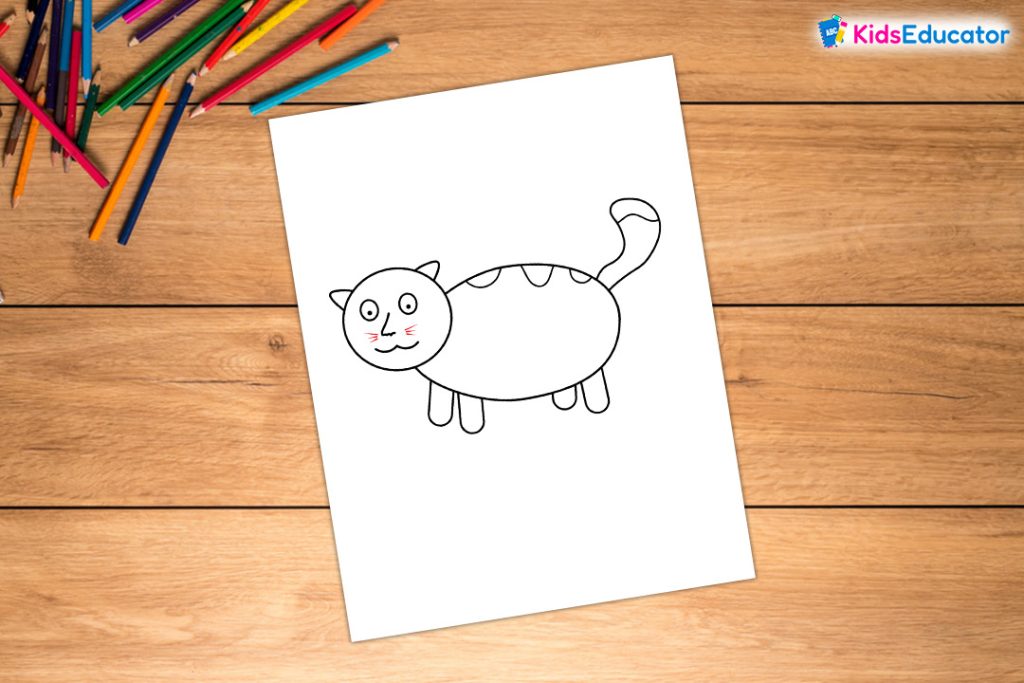
Legs
Drawing the body of a cat is an important step in creating an easy cat drawing for kids. Once you have drawn the head and the basic shape of the body, it’s time to add the legs. The legs give your cat a sense of movement and personality. Follow these simple steps to draw the legs:
- Start by drawing two straight lines extending down from the bottom of the body. These will be the front legs.
- Next, draw two curved lines extending from the bottom of the body, lower than the front legs. These will be the hind legs.
- To add more detail, draw smaller lines slightly curved inward to represent the cat’s toes.
- Repeat the steps on the other side to create the hind legs. Make sure they are aligned with the front legs.
Tail
The tail of a cat is one of its most distinctive features, and adding it to your cat drawing will bring it to life. Follow these steps to draw a cute cat tail:
- Extend a long, curved line from the back of the cat’s body. The curve can be in any direction you like.
- To create a fluffy tail, draw shorter curved lines extending from the main line, resembling a series of curves or zigzags.
- Make the tail thicker towards the base and gradually thinner towards the tip.
- Feel free to experiment with the shape and length of the tail to give your cat its own unique style.

Fur
Drawing the fur of your cat is the final step to complete your easy cat drawing. Here’s how you can add some texture to your cat’s fur:
- Using short, curved lines, add small fur details around the cat’s face and body, giving it a fluffy appearance.
- Don’t forget to add fur details to the ears and tail as well.
- Feel free to experiment with the length and direction of the fur lines to create different fur textures.
- You can also use shading techniques like crosshatching or stippling to give your cat’s fur more depth and dimension.
With these simple steps, you can easily draw the body, legs, tail, and fur of a cute cat. Remember to have fun and let your creativity shine through!
Adding Finishing Touches
Whiskers
Whiskers are an essential part of a cat’s facial features, and adding them to your cat drawing will bring it to life. To draw whiskers, use a black pen or marker and create thin, straight lines that extend outwards from the sides of the cat’s muzzle. These lines should be slightly curved and taper off at the ends, giving them a realistic look. You can make three to five whiskers on each side of the cat’s face, depending on the size of your drawing. Remember to keep the whiskers symmetrical on both sides.
Claws
Adding claws to your cat drawing will make it look more fierce and realistic. Start by drawing small curved lines at the tip of each of the cat’s paws. These lines should be pointed and slightly elongated. Make sure the claws are visible but not too large, as they should be proportionate to the size of the paws. You can also add some detail by drawing small lines on the paws to indicate fur texture.
Frequently Asked Questions For Easy Cat Drawing For Kids
How Do You Draw An Easy Cat For Kids?
Drawing an easy cat for kids is simple! Start with an oval shape for the body, then add a smaller oval for the head. Draw two pointy ears on top and add eyes, a nose, and a mouth. Use curved lines to draw the legs, paws, and tail.
Finally, color in your cat with crayons or markers.
What Are Some Tips For Drawing Cats For Kids?
When drawing cats for kids, keep it simple! Start with basic shapes like circles and ovals. Use simple lines for the features and add small details like whiskers. Encourage creativity by letting kids personalize their cats with different colors and patterns.
The most important thing is to have fun and enjoy the process!
Can I Use A Reference Image To Draw A Cat?
Absolutely! Using a reference image can help you get a better idea of how a cat looks and help you with proportions and details. Look for simple cat images that are easy to replicate and use them as a guide as you draw.
Remember, practice makes perfect, so don’t worry if it doesn’t turn out perfectly the first time!
Conclusion
To wrap up, drawing a cat can be a fun and easy activity for kids. By following the step-by-step instructions provided in this blog post, children can develop their artistic skills and create their very own masterpieces. Whether they’re beginners or experienced artists, this simple cat drawing tutorial is suitable for all.
So grab a pencil, and paper, and let your imagination soar as you create adorable cat drawings with your kids!